Overview[1]
Blind Faith was the event map for the third night of the Null & Void Event. Like other event maps, this map had a specialized wave structure with special enemies. Players started with a varying amount of cash, based on how many players there are in the match. The rewards received were based on how many waves were survived and if the match was won. This map had two difficulties, Easy and Hard. Cash was only gained if an enemy is killed, or in some cases, damaged by a specific amount of health. Additionally, the amount gained was a set amount of cash, which was not always equal to the enemy's health. Enemies split their cash between players, regardless of how much damage the player dealt to it. If, in a duo, one player did all the damage to an enemy, both players would receive 50% of the cash the enemy would normally give in solo. This meant that in solo, you received 100% of the cash when an enemy was killed, or it was damaged enough. With each additional player, this is reduced to 50% in duo, 33% in trio and 25% in quad. If it is a decimal, it gets rounded up or down depending on the decimal value. If it is at least 0.5, it gets rounded up. If it is less than 0.5, it gets rounded down. Health of enemies in this mode scaled with player count and difficulty. In Easy, it was 5% in trio and 10% in quad. Hard difficulty had no health scaling. This map had the Path Spawn Even modifier, which was an indicator of each enemy only appearing on one path. In the hard difficulty, various curses could also be applied, Skills became disabled and the Farm's income was disabled.
Stats
- Developer
- Your_Adversary
- Difficulty
- Normal
- Length
- Long
- Level Requirement
- None
- Mode
- Event
- Waves
- 30
Design & Path
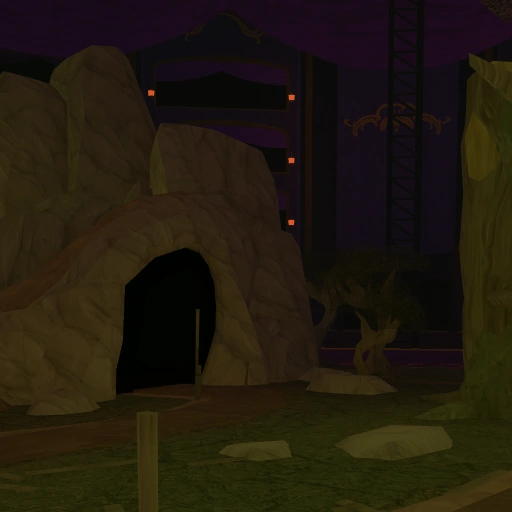
Blind Faith was a broken down church. The church had a broken roof, revealing the purple sky and brown spikes outside. Inside the church, there were a few pillars, pews and a lot of rubble. A wooden platform could be found on one side of the map, which could have a Star Cannon placed on it. Before one appeared there, eight parts of scrap had to be bought to rebuild it. At the entrance, Narrator held up the Rift Walker as Kronus was corrupting its body. On Wave 20, Kronus became an enemy which when defeated, jumped out of the church through the hole in the roof. On the final wave, Rift Walker became the final boss, leaving the entrance empty. The path started at one gate in the church and ends at another. It first took a loop, then went into a few long straights. The path avoided the obstacles placed on the map.
Curses
In the Hard difficulty, every fifth wave a curse was applied to the match. Curses were modifiers which came with both upsides and downsides. They lasted the entire match and, majority of the time, did not boost the rewards the match gave out. The following curses could be applied: Justice, upon reaching 25% of the base health, every tower received a 10% Damage Buff. The Fool, set the base health to 1 but also increased all wave bonuses by 10%. The Tower, debuffs like stuns now lasted 50% longer when applied to towers, but debuffs like burn now lasted 25% longer when applied to enemies. Additionally, Call to Arms duration was also extended by 10%. The Moon, made all enemies Hidden but also gave every tower a 10% Range Buff. The Star, applied a 5% Range Debuff and 5% Firerate Debuff (~5.26% increase) to towers, but increased every player's total tower placement limit by 5. The Sun, enemies now all spawned with the Stun Immunity, Freeze Immunity and Burn Immunity, but towers now had all three detections. The Chariot, all towers received a 10% Firerate Debuff (~11.11% increase), which was replaced with a 10% Firerate Buff and 10% Damage Buff on the final wave. Temperance, Mutation was applied which boosted the Shield Health of enemies by 5% of their base health, but gave all towers stun immunity and boosted rewards by 20%. Death, all enemies were now Bloated and Nimble, but rewards were increased by 20%. For the first three selections, the curses that appeared were not random. These curses were: On Wave 6, the curses would be Justice, Death, and The Tower.
Preset Loadouts
Each player was allowed to pick from one of three preset loadouts in the Easy difficulty. Alongside these preset options, players could opt to use their current loadout as the first choice. However, if one's loadout contained no towers, this option would be unavailable.
Rewards
The game calculated how many Coins Coins and you received based on how many waves you survived and if you won a match. During periods of 100% more (Friday – Sunday), any earned was multiplied by 2x through the XP Boost modifier. The VIP gamepass also multiplied any earned by 1.25x through the VIP Boost modifier. These two boosts were additive. Rewards are calculated as: Triumphing Blind Faith could give out an additional reward, which could be a crate, consumable or ticket. They were meant to be guaranteed, though due to a bug this did not always happen. These items were: Common (45.45%) (2-4) (2-3) (2-3) Low Grade Crate Barricade (2-4) Supply Drop (2-4) Turkey Leg (2-4) Pumpkin Bomb (2-4) Uncommon (27.27%) Cooldown Flag (2-4) Damage Flag (2-4) Range Flag (2-4) Mid Grade Crate Sugar Rush (2-3) Rare (18.18%) Napalm Strike (2-3) Blizzard Bomb (2-3) Unholy Storm (2-3) Necromancer's Tome (2-3) High Grade Crate Legendary (9.09%) Molten Monster There were also a few badges and achievements which could be obtained when playing this map. These were
Wave Structure
Blind Faith's wave bonus was: 500 + ([Waves Completed - 1] × 100)^1.225 Depending on player count, the wave bonus is reduced using multipliers. These multipliers are: The wave clear bonus appeared when every enemy from that wave was killed and no damage was dealt to the base health. It was 12% of the wave bonus in solo, while for duo, trio and quad it was 10%. Waves could not be skipped in Blind Faith. The waves in Blind Faith mode followed these timings: Bolded names indicate an enemy type's debut. Easy Wave Structure ---- Hard Wave Structure
Strategy
Towers like the Golden Crook Boss, Golden Soldier, Golden Scout or Toxic Gunner can be pretty effective here. Towers with both flying and hidden detection are especially useful due to the early-game waves containing early Hidden and Flying enemies. The Accelerator, Turret and Ranger are heavily recommended for the late game waves and tanky threat such as the Null Engineer and Null Brawler. The Ranger's map-wide range are useful against fast high health enemies like the Null Beast The DJ Booth purple track can slowing them down, giving for other towers to attack them for more time. The Medic can be used to shield towers from stuns, though it cannot help against freezing abilities from enemies like the Null Freezer or Kronus. Although you can triumph this map in solo on the easy difficulty, it is not possible to triumph this map in solo on the hard difficulty. If soloing on the hard difficulty, you may only reach up to Wave 12 before losing. Therefore, having at least one other player is required to triumph hard mode. It is highly recommended to have more than one player bringing the DJ Booth, due to the large scale map and long path. The Star Cannon appears on this map, which can be used to deal 1,000 damage to an enemy or to prevent the Rift Walker's Lord Exo's Rebirth ability. While technically not useless before Wave 30, the 1,000 damage it deals is generally not worth getting. Therefore, it is best to wait until the last few waves to buy it. The Lord Exo's Rebirth ability will cause the entire map to turn yellow, with Lord Exo coming out of the Rift Walker.
Update History
31 October 2025 - v1.79.0 Blind Faith added. Character animations do not play. Trio Easy eco scale is set to 50% instead of 5%, leading to it giving no wave bonus with the Stonks Skill. 1 November 2025 - v1.79.1 Character animations now play. 26 November 2025 - v1.80.1e Blind Faith removed.
Trivia
Blind Faith had seven separate narrators, the highest number of them to be used in any gamemode at once. It was intentionally designed by the developers for hard mode on Night 3 to be impossible for solo. This is likely because: All enemies have the same health regardless of the number of players (no health scaling). Starting cash and wave bonuses are unaffected by the player count and the small amounts usually cannot cover a solid defense when played in solo. Multiple enemies with higher health begin spawning as early as wave 1. The Rift Walker starts with a 2,500,000 health pool when the Death curse is not active. And if his Lord Exo's Rebirth ability is used and the star cannon was not used, the player could lose easily. The Star Cannon that appeared on this map was first used in the Solar Eclipse Event's Totality Tower. While both were used to prevent an ability that dealt damage to the base health, unlike the Solar Eclipse Event it needed to be rebuilt first. Additionally, when used on any other enemy it dealt 1,000 damage instead of doing nothing.